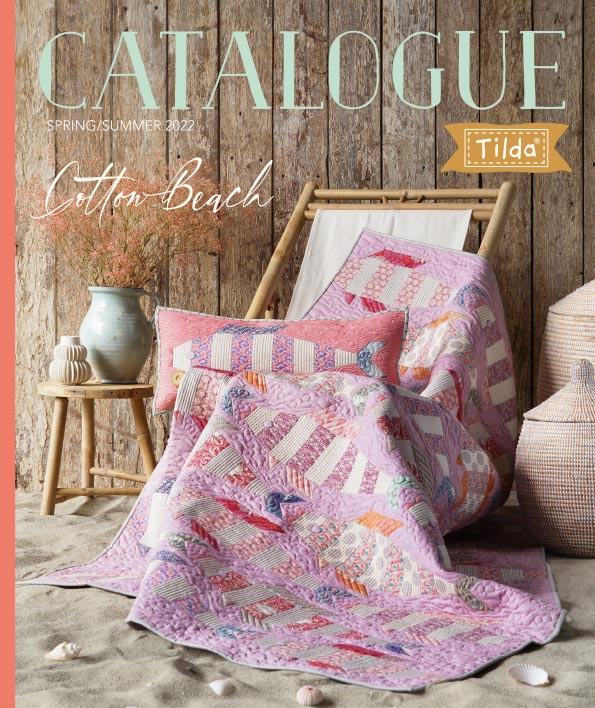


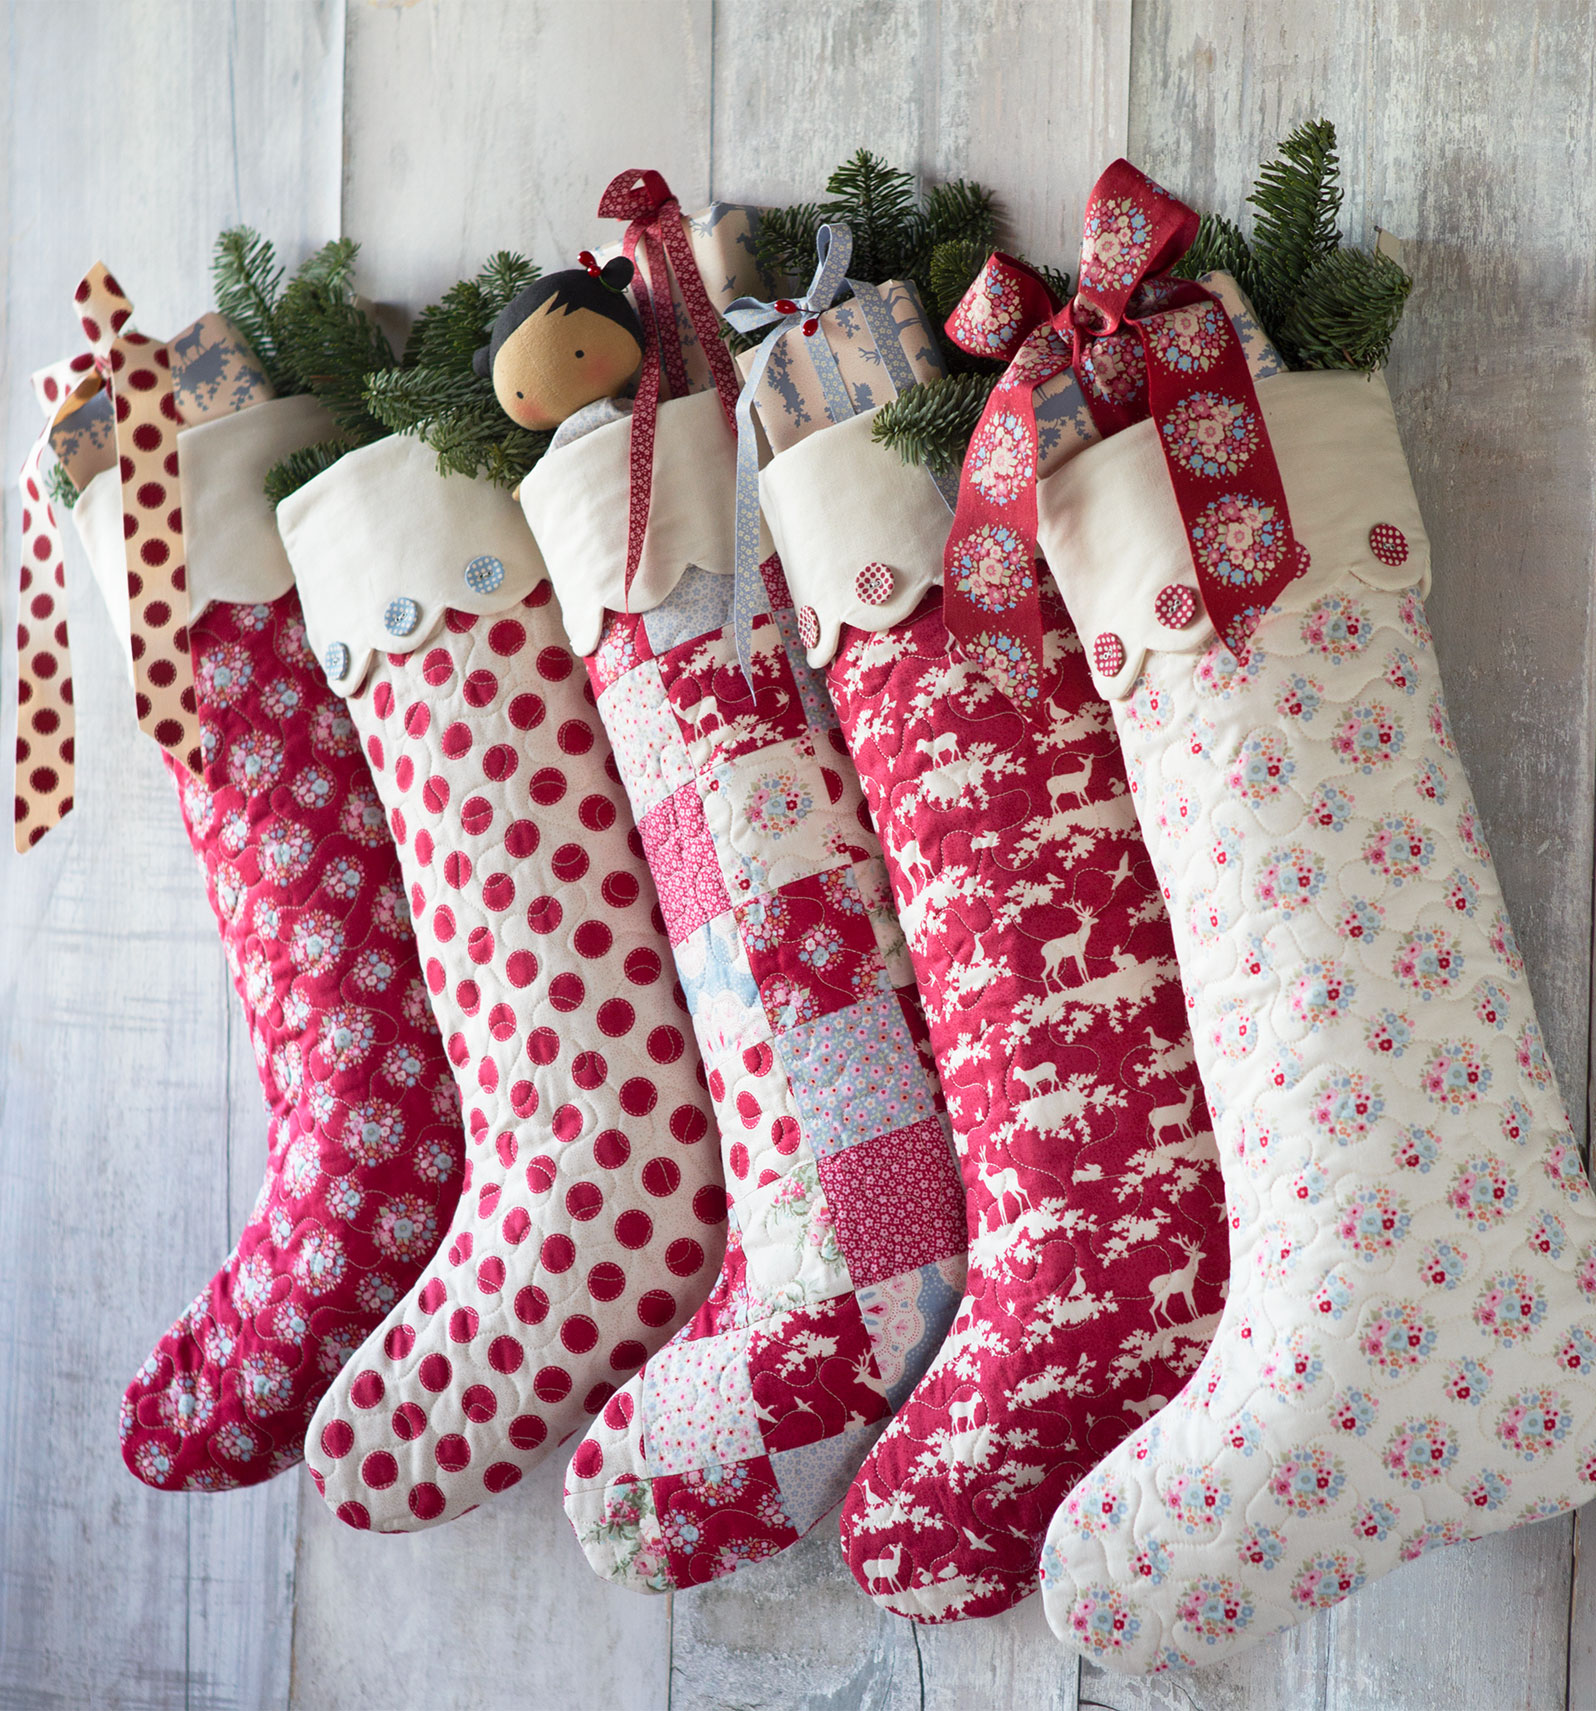
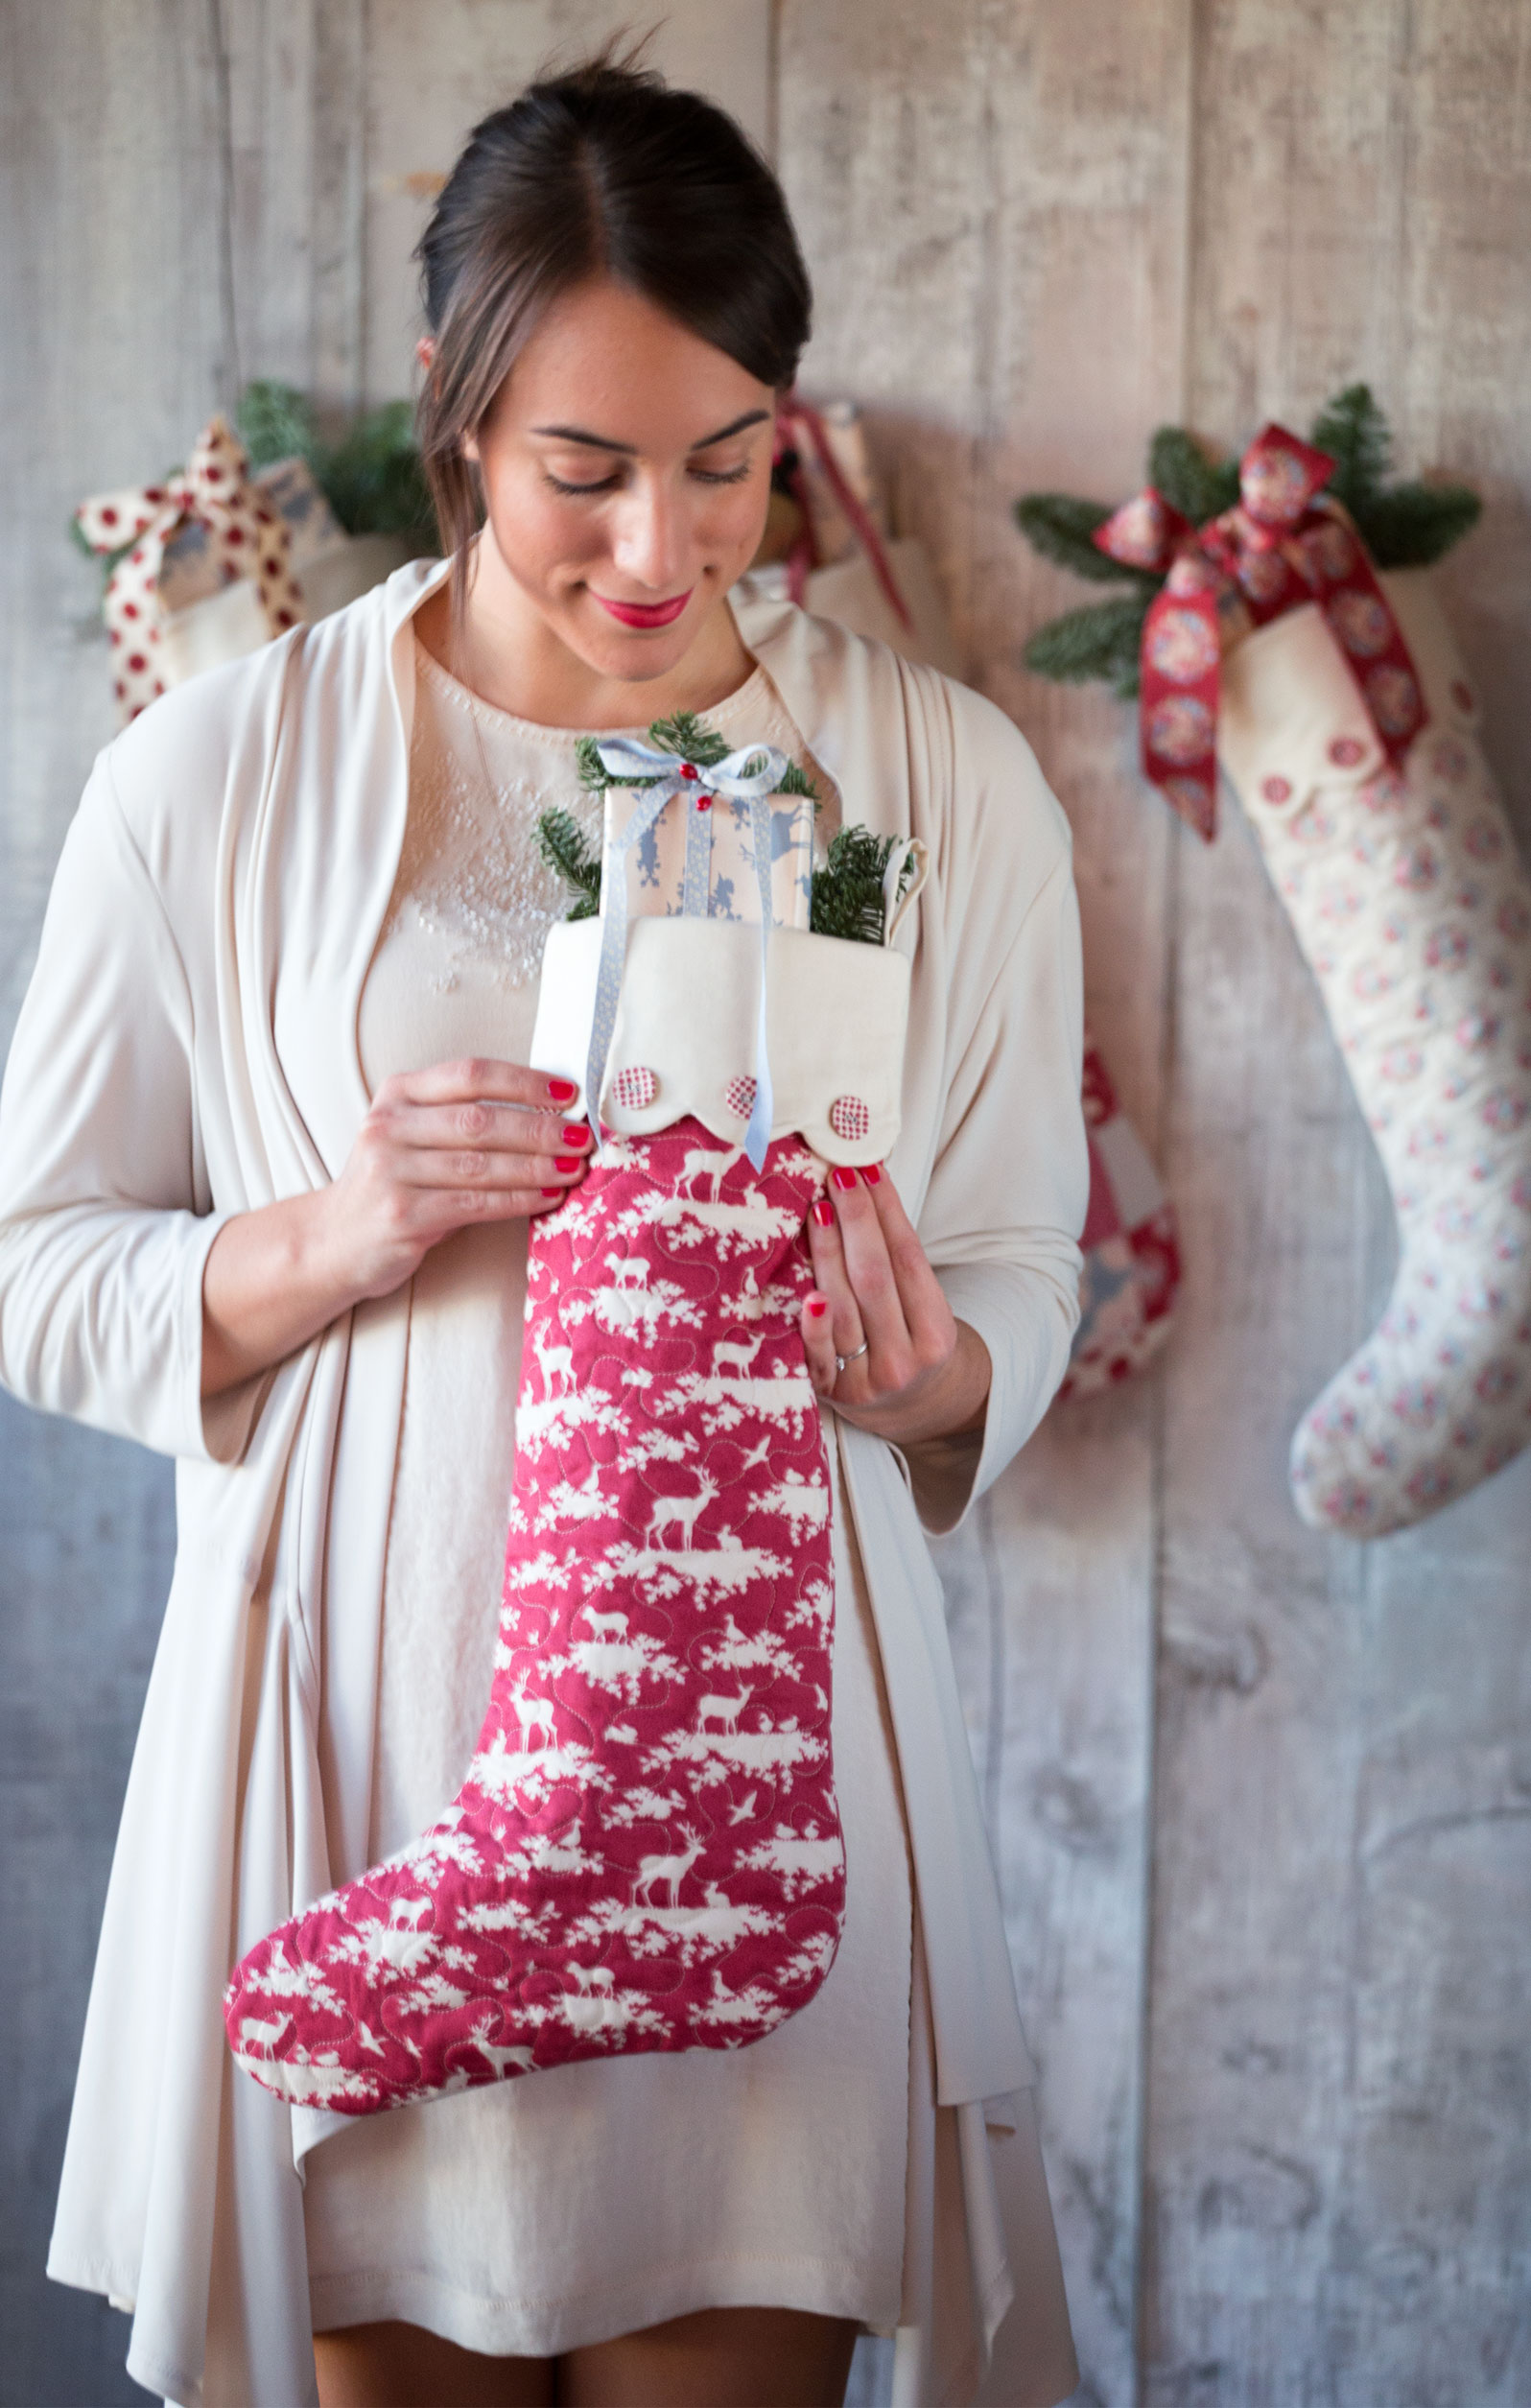
Add a personal touch to your Christmas decor with large cosy and comforting Christmas stockings.
Full of candy and gifts they will also make a sweet and unique gift for family and friends.
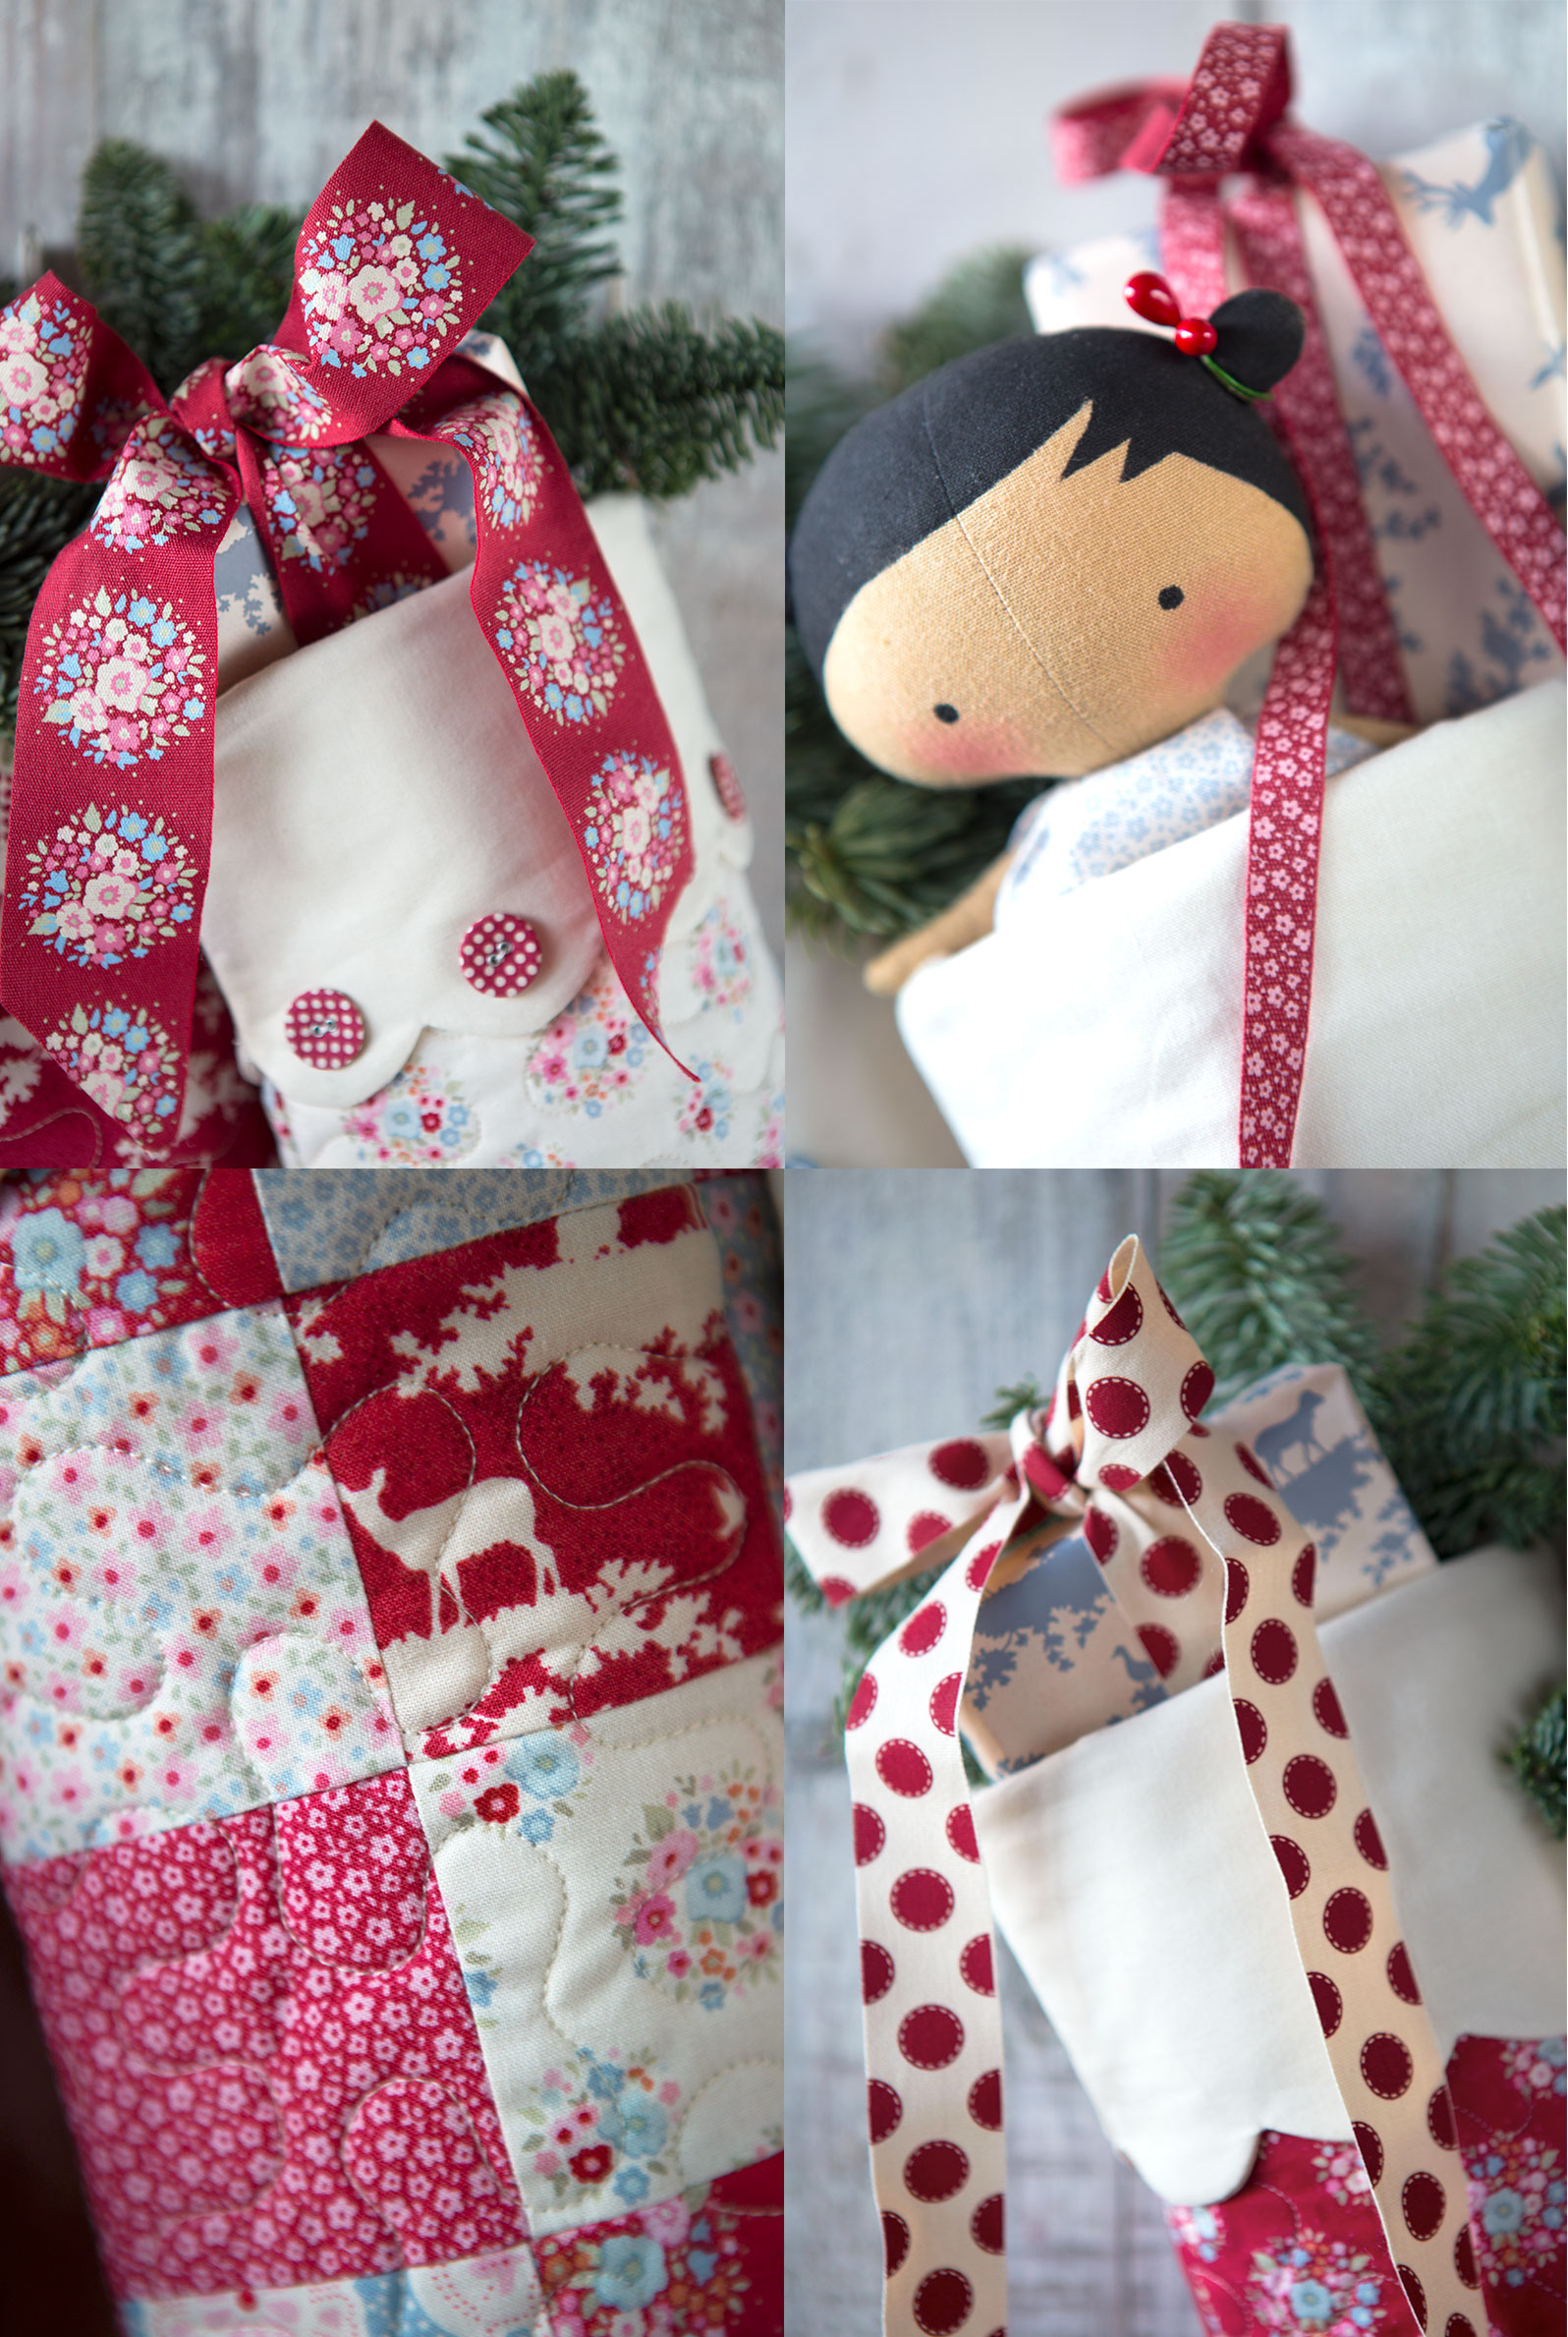
When the stockings are finished with folded edges they measure 55 cm (22in)
We used the “Sweetheart” fabric collection, quilt wadding, off-white quilt fabric for the lining, and “Sweetheart” buttons with spots for decoration”.
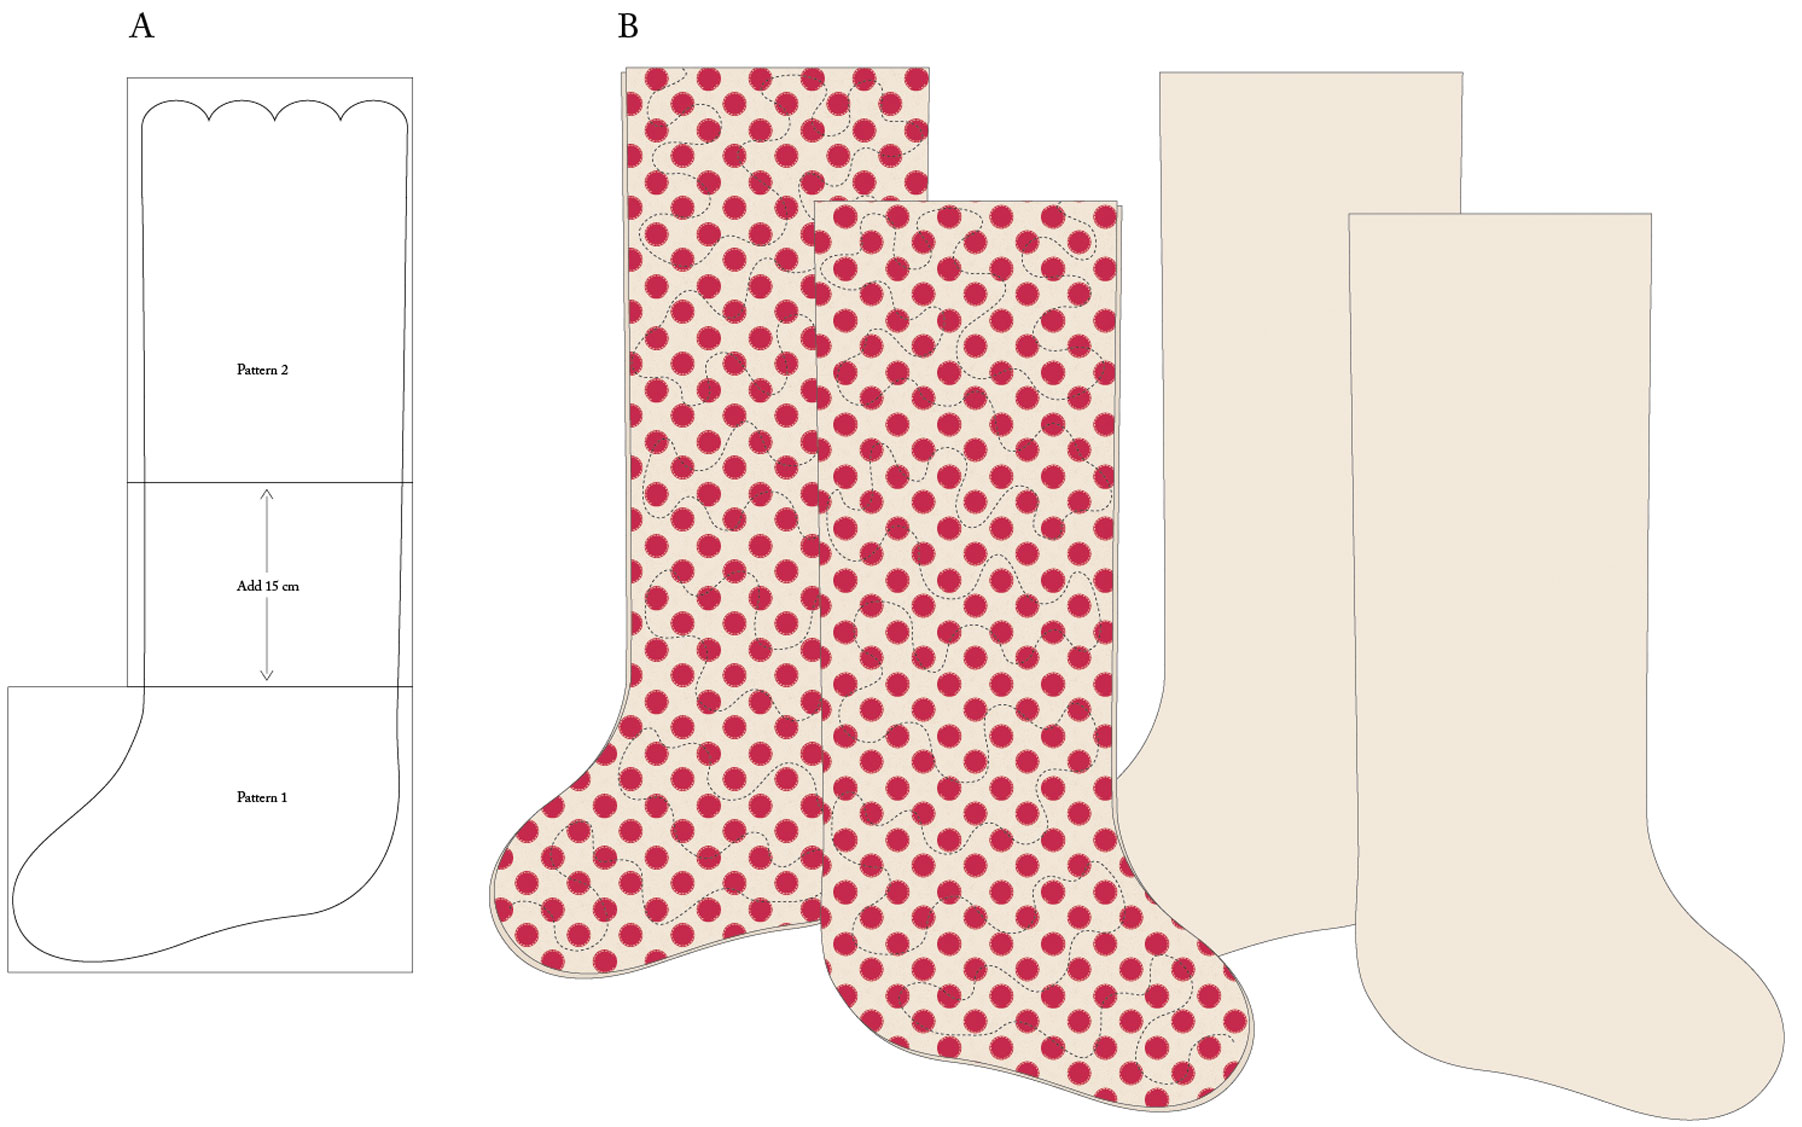
Print the two parts for the pattern:
Christmas Stocking Pattern 1 and Christmas Stocking Pattern 2.
Add 15 cm (6in) to the length of the stocking between the pattern pieces, see figure A.
Make a paper template by gluing the pieces together, and cut out the full stocking shape.
Cut two opposite/reversed stocking pieces in the stocking fabric, lining fabric and wadding.
If you want to quilt the stockings as we have done here you will also need two pieces in backing fabric. Add a large seem allowance to all the pieces.
The backing will not be visible in the end, so you can use any old fabric.
Patchwork stocking
The patchwork stocking is made out of 3in (7,5 cm) squares. Seem allowance is included so when sewn into the patchwork the squares are 2,5in (6,25 cm).
Sew together enough squares to cover the pattern and seem allowance for each of the stocking pieces, and continue as you would with a simple stocking piece.
Attach the wadding to the back of the stocking pieces, and the backing fabric on the other side of the wadding. You can use a basting spray or stitch a large seem along the edge.
Quilt the stocking pieces by hand or sewing machine, see figure B.
Place the lining and stocking pieces right side together.
Trace or refresh the pattern onto the lining piece and sew along the scalloped edge. See figure C.
Cut any extra seem allowance only along the scalloped edge, and make small notches between the bows. Be sure not to cut into the seem. See figure D.
Place the two sewn-together parts right sides together. Trace or refresh the pattern drawing on the stocking part, and sew around. Leave a reverse opening in the lining part, see figure E.
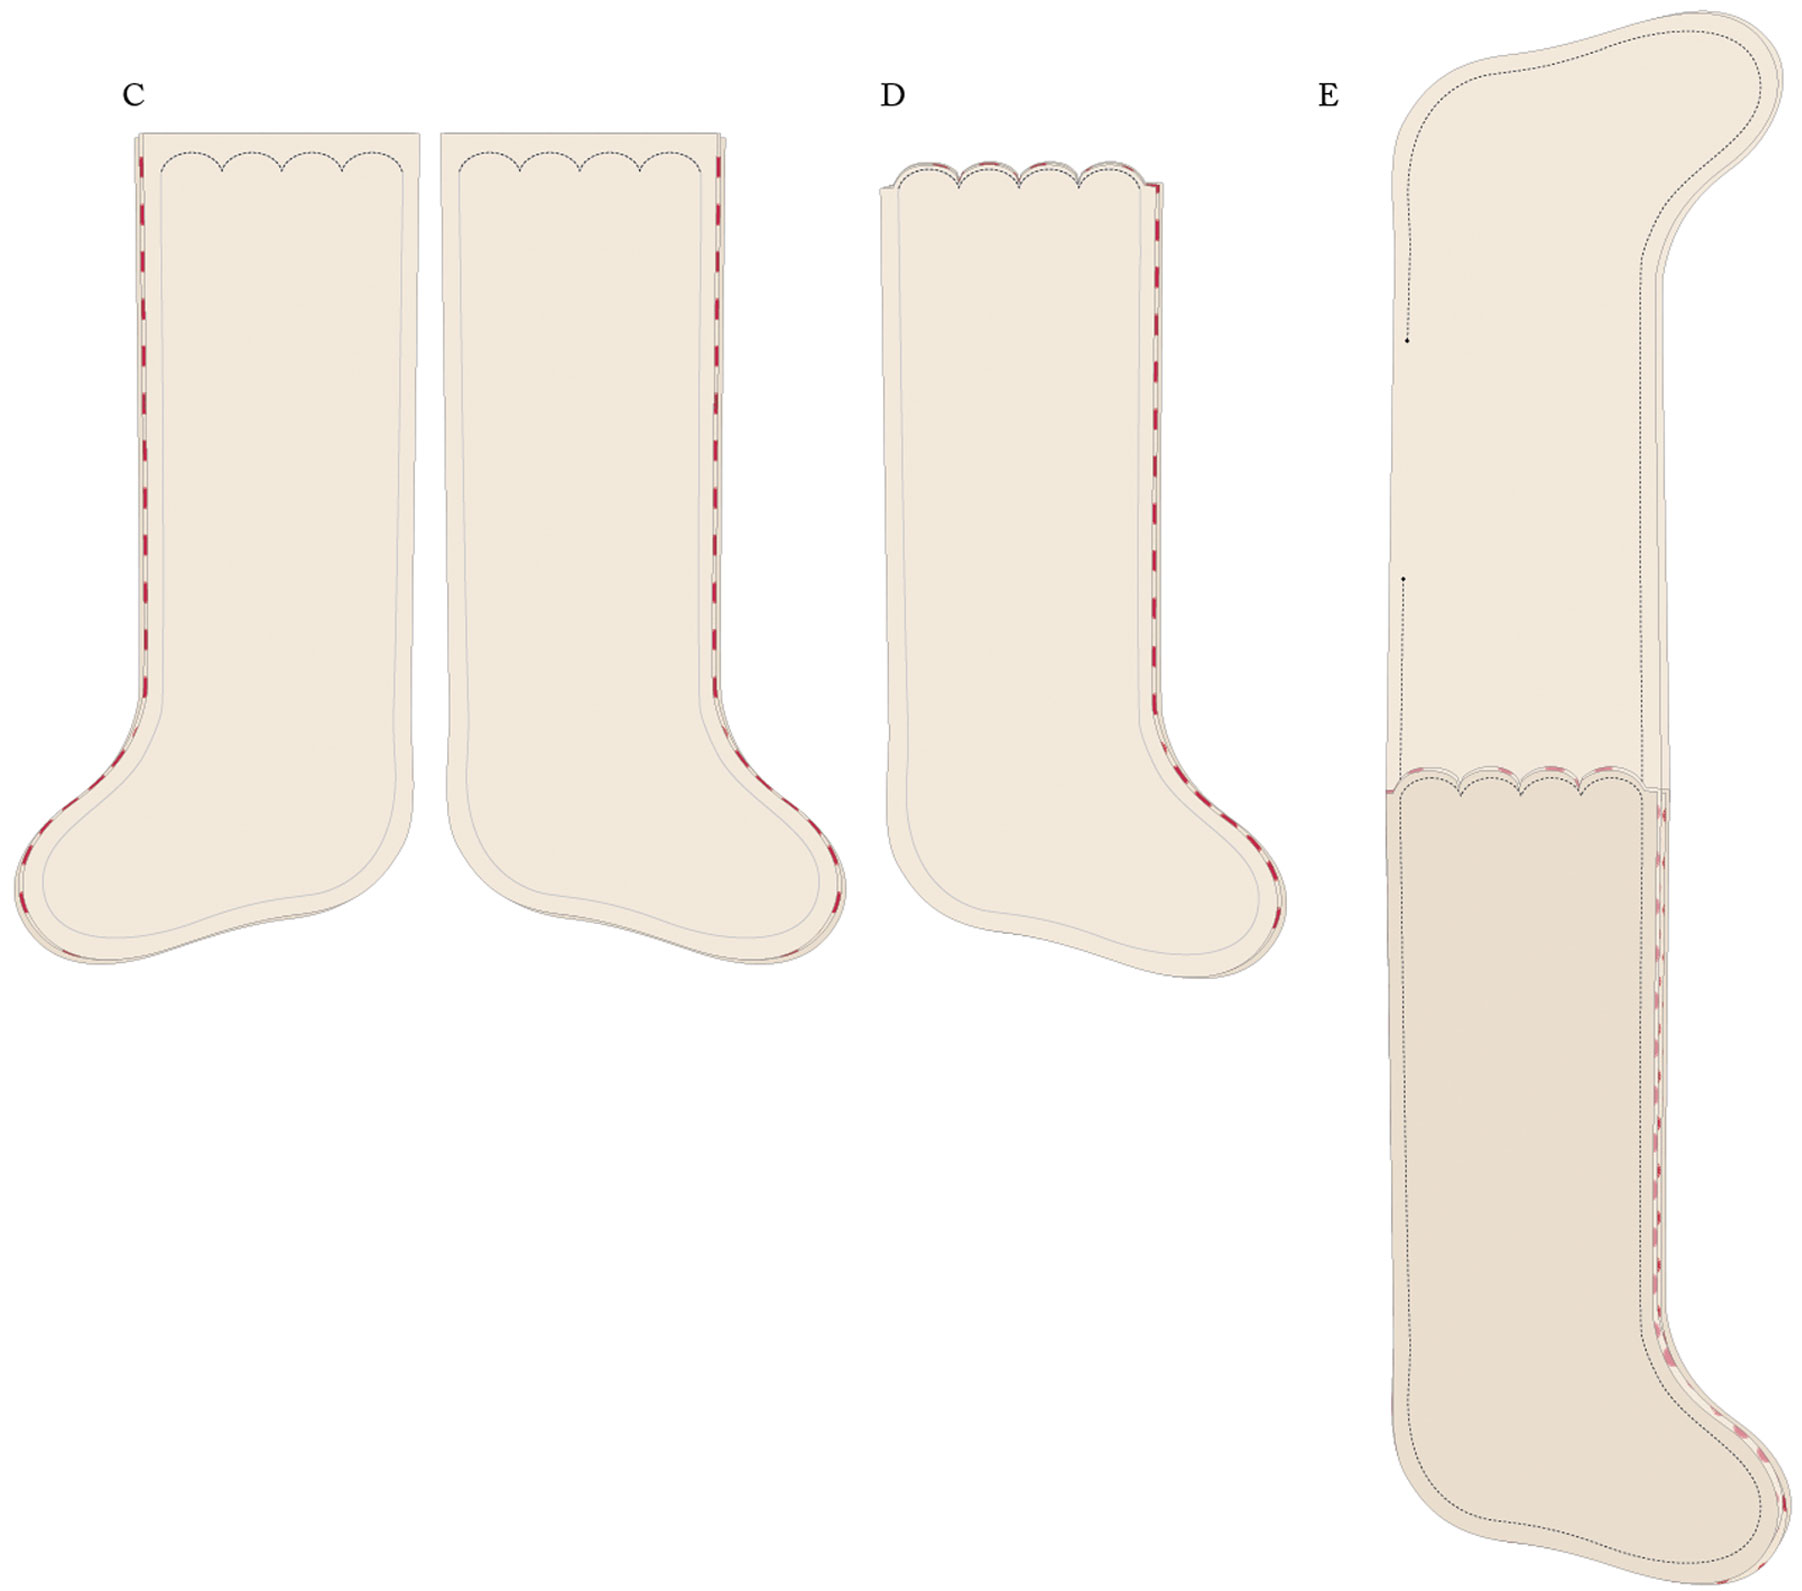
Cut any extra seem allowance and make notches in the seem allowance where the seem curves inwards.
Turn the stocking inside out. Use a flower stick or similar to turn the scalloped edge.
Push the lining into the stocking part. (If you need to iron turn the stocking and iron from the lining side to avoid damaging the quilt effect.)
Fold down the edge, see picture of stockings.
Loop
Cut a 3.5 x 20 cm (1,3/8 x 8in) strip for the loop.
Fold and iron each short end approximately 1 cm (3/8in) inwards.
Fold and iron approximately 7 mm (1/4in) inwards along each long side, then fold and iron the strip in half so that it will become approximately 1 cm (3/8in) wide.
Stitch up the open side by hand or machine.
Fold the loop and tack the ends to the inside of the stocking.
Buttons are sweet decor along the scalloped edge.
Have a great weekend!